Configuration of VS Code (Mac Version) #
Author: Erhua
Keywords: vs code, Mac
Visual Studio Code (VS Code) is a lightweight and powerful source code editor that supports Windows, macOS, and Linux, and is free and open source. It has rich extensions that can be used to write code in most programming languages. With plugins, we can even edit code on a remote server using VS Code on our local computer. This article mainly introduces how to use VS Code with the LaTeX Workshop plugin to write LaTeX documents, and how to configure them.
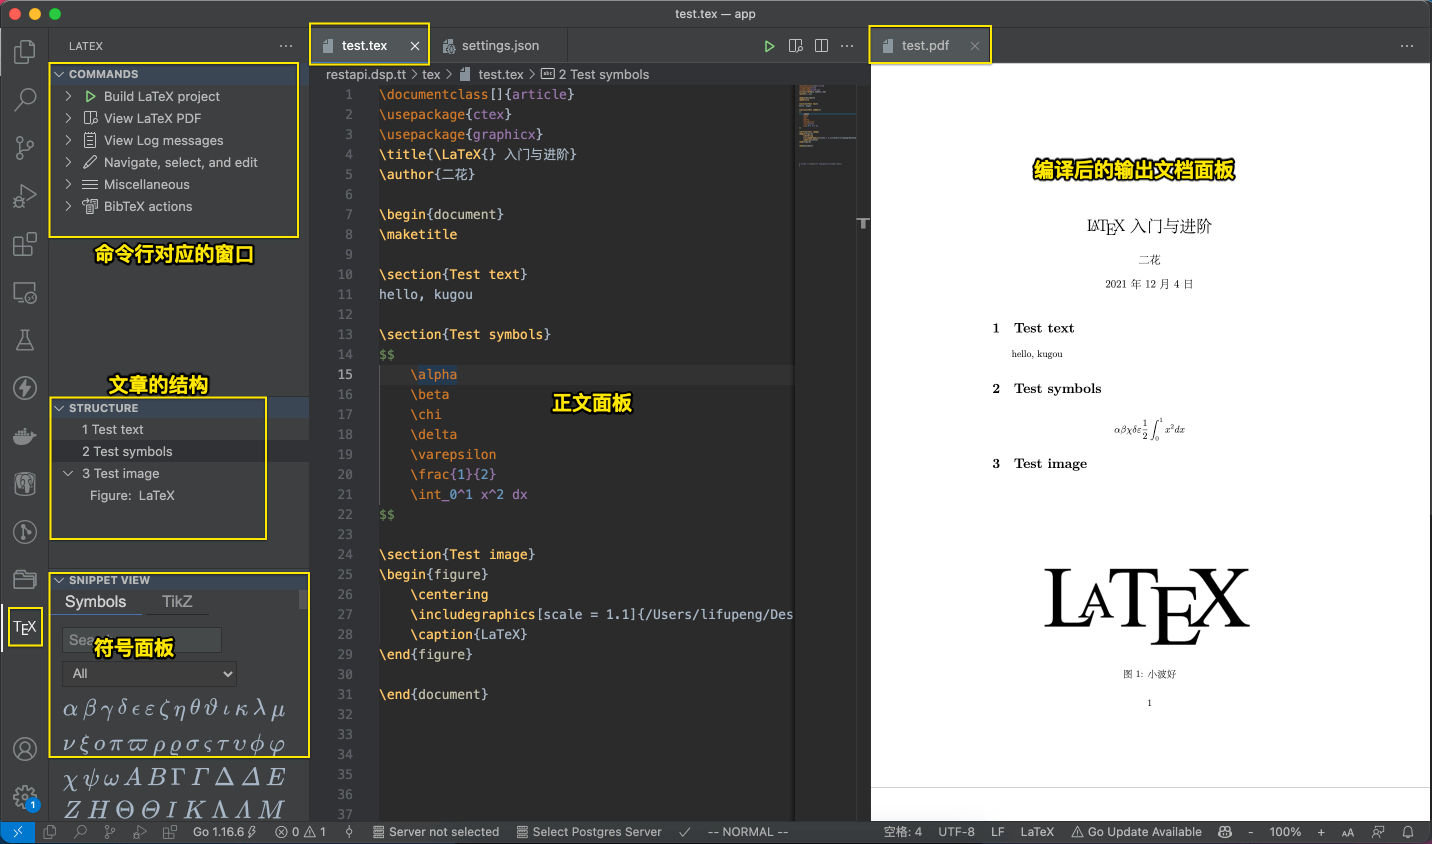
Sample of Editing LaTeX Documents with VS Code #
The following image shows how to edit LaTeX documents in VS Code and provides a simple demonstration of the functionality of each workspace.
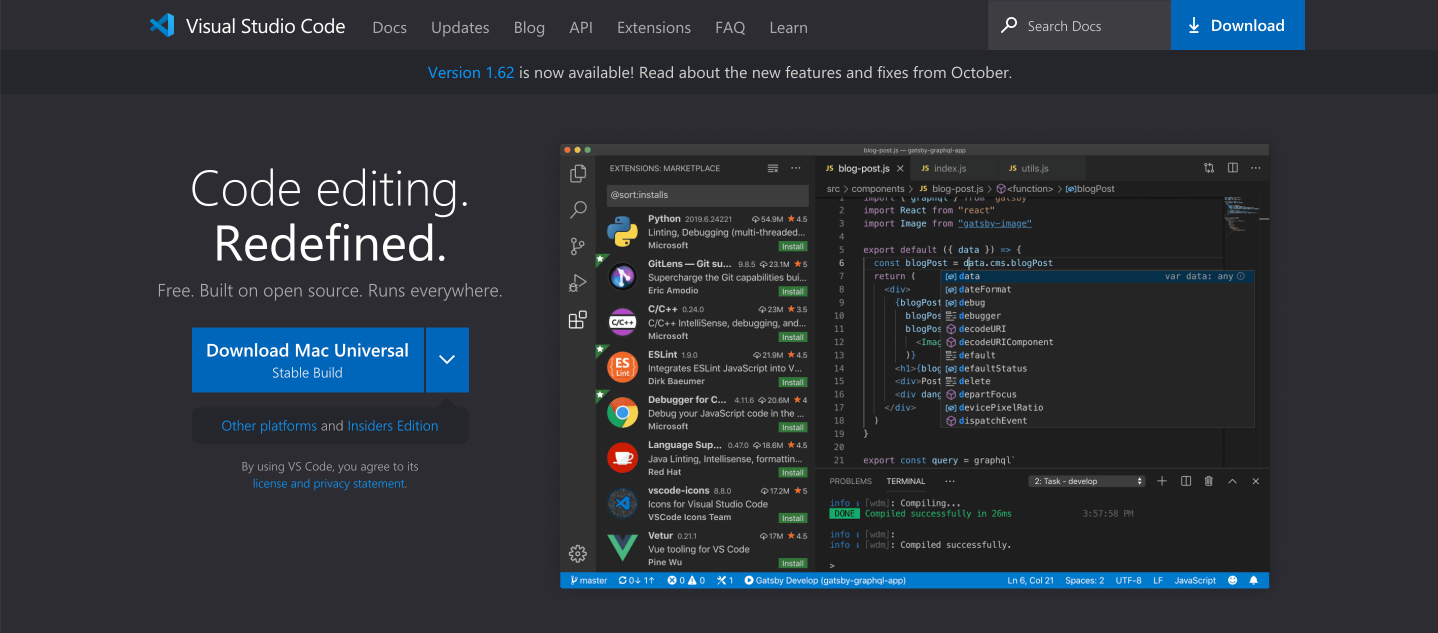
Installing VS Code #
Download link: https://code.visualstudio.com/
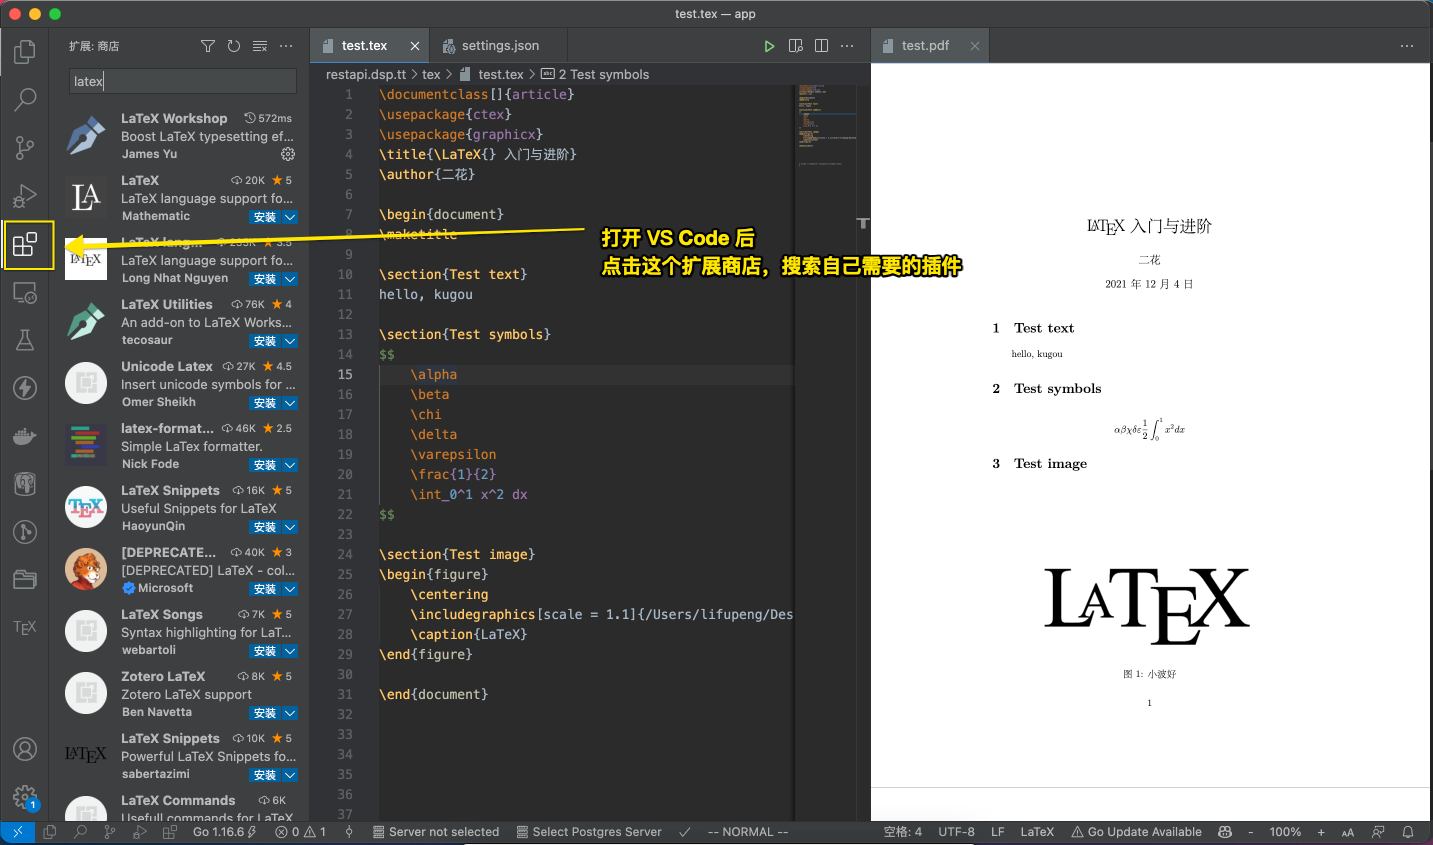
Searching and Installing Plugins #
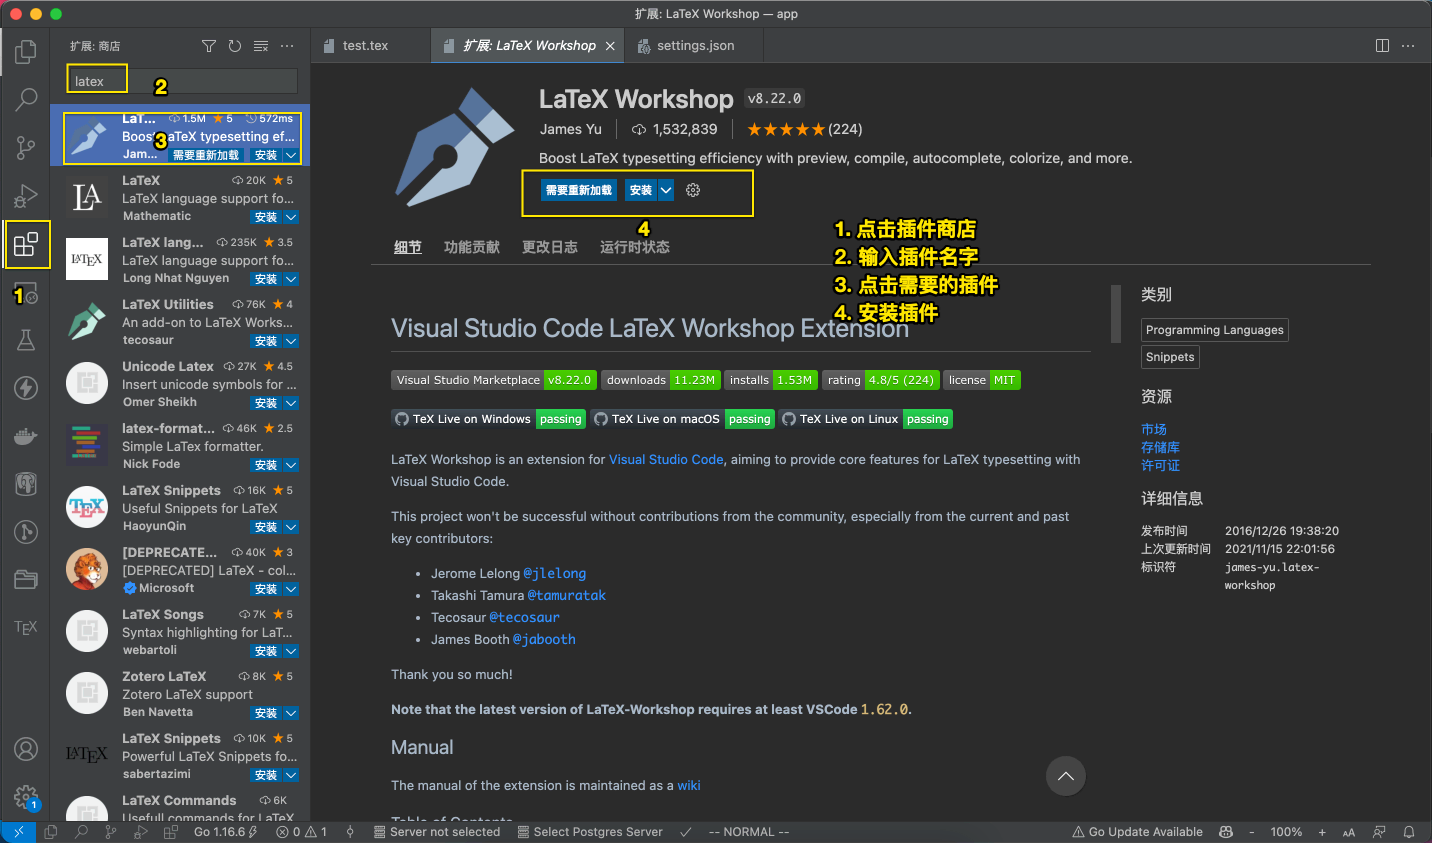
LaTeX Workshop Plugin and Configuration #
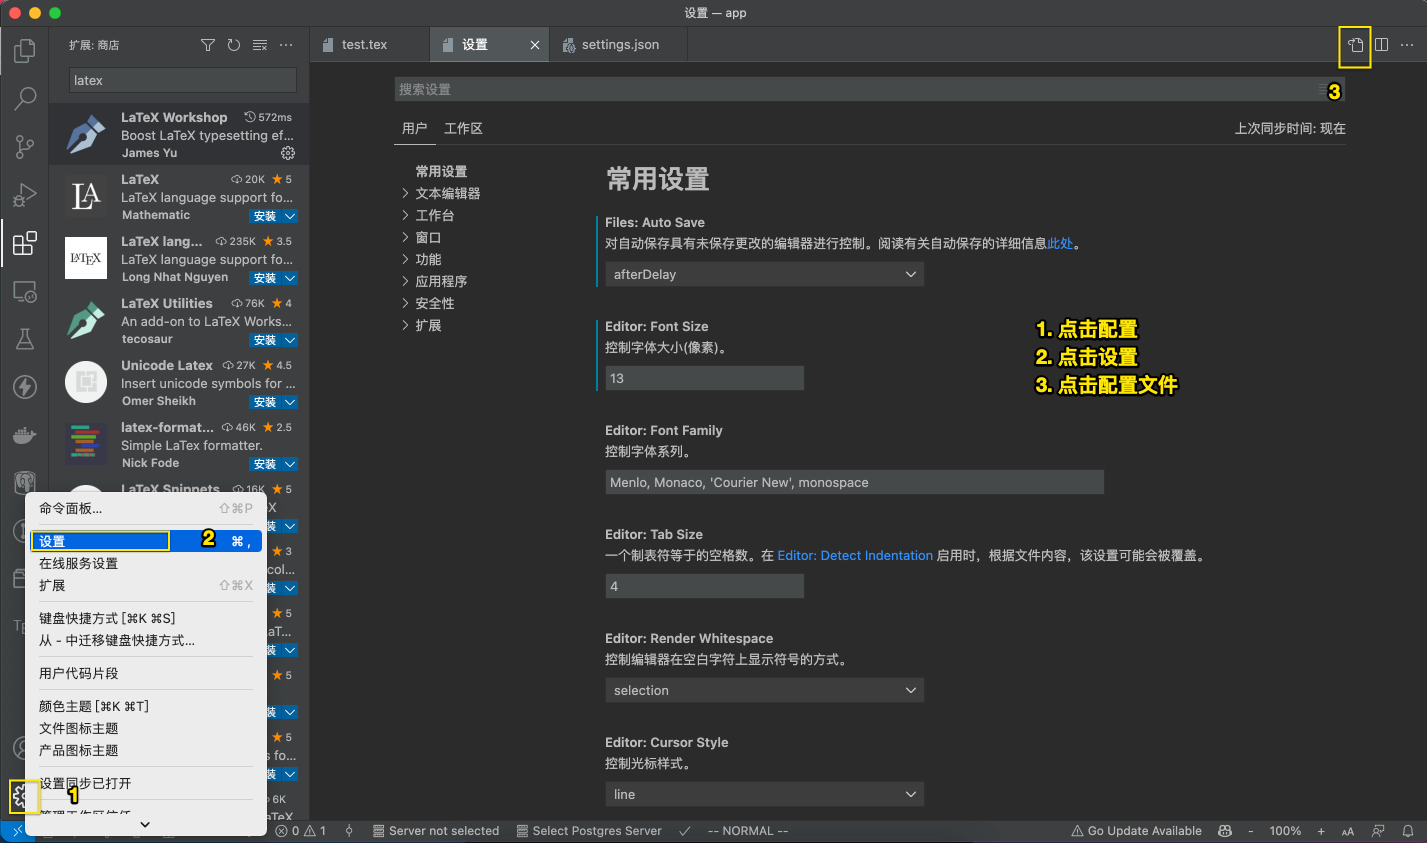
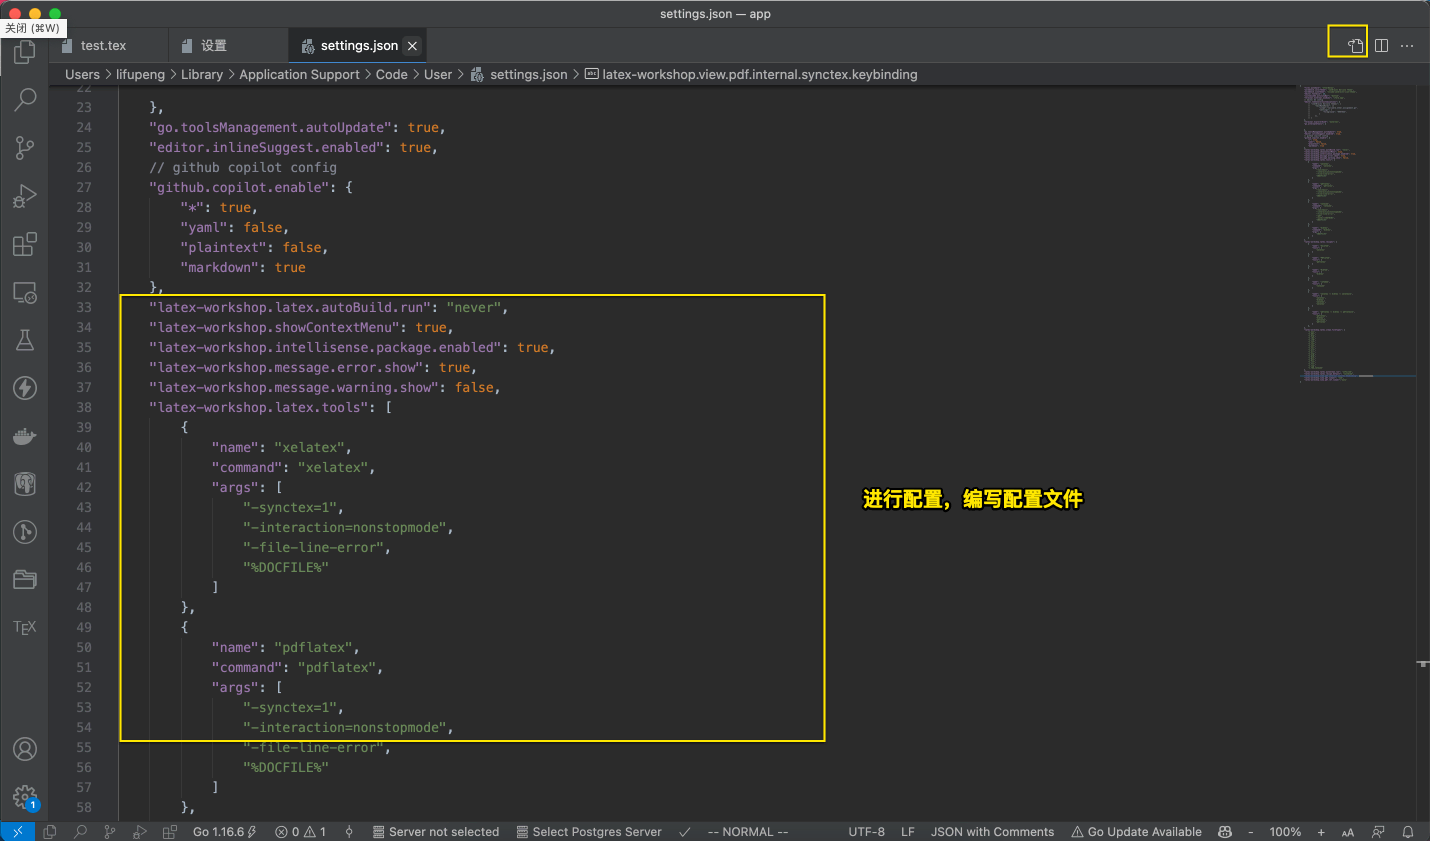
Here is the detailed configuration file:
{
    "latex-workshop.latex.autoBuild.run": "never",
    "latex-workshop.showContextMenu": true,
    "latex-workshop.intellisense.package.enabled": true,
    "latex-workshop.message.error.show": false,
    "latex-workshop.message.warning.show": false,
    "latex-workshop.latex.tools": [
        {
            "name": "xelatex",
            "command": "xelatex",
            "args": [
                "-synctex=1",
                "-interaction=nonstopmode",
                "-file-line-error",
                "%DOC%"
            ]
        },
        {
            "name": "pdflatex",
            "command": "pdflatex",
            "args": [
                "-synctex=1",
                "-interaction=nonstopmode",
                "-file-line-error",
                "%DOC%"
            ]
        },
        {
            "name": "latexmk",
            "command": "latexmk",
            "args": [
                "-synctex=1",
                "-interaction=nonstopmode",
                "-file-line-error",
                "-pdf",
                "-outdir=%OUTDIR%",
                "%DOC%"
            ]
        },
        {
            "name": "bibtex",
            "command": "bibtex",
            "args": [
                "%DOC%"
            ]
        }
    ],
    "latex-workshop.latex.recipes": [
        {
            "name": "XeLaTeX",
            "tools": [
                "xelatex"
            ]
        },
        {
            "name": "PDFLaTeX",
            "tools": [
                "pdflatex"
            ]
        },
        {
            "name": "BibTeX",
            "tools": [
                "bibtex"
            ]
        },
        {
            "name": "LaTeXmk",
            "tools": [
                "latexmk"
            ]
        },
        {
            "name": "xelatex -> bibtex -> xelatex*2",
            "tools": [
                "xelatex",
                "bibtex",
                "xelatex",
                "xelatex"
            ]
        },
        {
            "name": "pdflatex -> bibtex -> pdflatex*2",
            "tools": [
                "pdflatex",
                "bibtex",
                "pdflatex",
                "pdflatex"
            ]
        },
    ],
    "latex-workshop.latex.clean.fileTypes": [
        "*.aux",
        "*.bbl",
        "*.blg",
        "*.idx",
        "*.ind",
        "*.lof",
        "*.lot",
        "*.out",
        "*.toc",
        "*.acn",
        "*.acr",
        "*.alg",
        "*.glg",
        "*.glo",
        "*.gls",
        "*.ist",
        "*.fls",
        "*.log",
        "*.fdb_latexmk"
    ],
    "latex-workshop.latex.autoClean.run": "onFailed",
    "latex-workshop.latex.recipe.default": "lastUsed",
    "latex-workshop.view.pdf.internal.synctex.keybinding": "double-click",
    "latex-workshop.view.pdf.viewer": "tab",
    "latex-workshop.view.pdf.ref.viewer":"auto",
}
Note: After adding the configuration file, you need to open the command palette with ctrl + p and enter “> reload window”, or click View, select Command Palette, and then enter “reload window” to apply the configuration file.