Inserting Figures #
Author: Erhua
Keywords: Figures, Transformation
Inserting and transforming images are essential skills that you need to learn.
Inserting Figures #
The basic packages graphics or graphicx in LaTeX provide commands for inserting figures and modifying their geometries.
We assume that you already know how to set the float of images and tables. If you are not familiar with this concept, please refer to this link.
The figure insertion command is completed by the commands provided by the graphics or graphicx packages (it is recommended to use the graphicx package because it supports the syntax option=value):
\includegraphics[options]{file}
height |
The height of the graphic (can be any TeX dimension). |
|---|---|
totalheight |
The total height of the graphic (can be any TeX dimension) (added in LaTeX2e/95). |
width |
The width of the graphic (can be any TeX dimension). |
scale |
The scaling factor of the graphic. Setting scale=2 will double the size of the inserted graphic. |
angle |
The rotation angle of the graphic, in degrees counterclockwise. |
origin |
The point around which the graphic rotates. The default is the reference point of the graphic (added in LaTeX2e/95). For example, origin=c will rotate the graphic around its center. The possible values are (l,r,c,t,b,B) which represent (left,right,center,top,baseline,bottom). Using one or two values at the same time is allowed. The default value is lb. |
bb |
The value of the BoundingBox. bb=10 20 100 200 sets the left-bottom corner of the BoundingBox at (10,20) and the right-top corner at (100,200). Because \includegraphics automatically retrieves the BoundingBox values from the EPS file, this option is generally not used. However, it is useful when the BoundingBox in the EPS file is missing or incorrect. |
Basic methods for inserting images:
\documentclass[]{article}
\usepackage{caption,subcaption}
\usepackage{graphicx}
\usepackage{ctex}
\begin{document}
\begin{figure}
\centering
\includegraphics[width = 1cm]{/Users/fplee/blog/public/xiaobo.png}
\includegraphics[height = 2cm]{/Users/fplee/blog/public/xiaobo.png}
\includegraphics[scale = 0.2]{/Users/fplee/blog/public/xiaobo.png}
\caption{Hello, Xiaobo}
\end{figure}
\end{document}

\includegraphics[width = 1cm,angle = -90]{/Users/fplee/blog/public/xiaobo.png}
\includegraphics[height = 2cm,angle = -45,origin = c]{/Users/fplee/blog/public/xiaobo.png}
\includegraphics[scale = 0.2]{/Users/fplee/blog/public/xiaobo.png}
% Specific angle settings can be found in the table above

NOTICE
Since compiling images takes time and the file size is slightly large, in the early stages of typesetting a paper, you can set the \includegraphics command to use the draft option, or use the global draft option for the document class. This way, the generated PDF will only display a large box with the same size as the image, with the filename inside.
\documentclass[draft]{article}
or
\usepackage[draft]{graphicx}
Transformation #
To be supplemented
Setting Font #
How to set the font for the caption of the figure? Generally, the package caption is used.
\usepackage{caption}
\captionsetup[figure(或者table)]{font = small, label = bf}
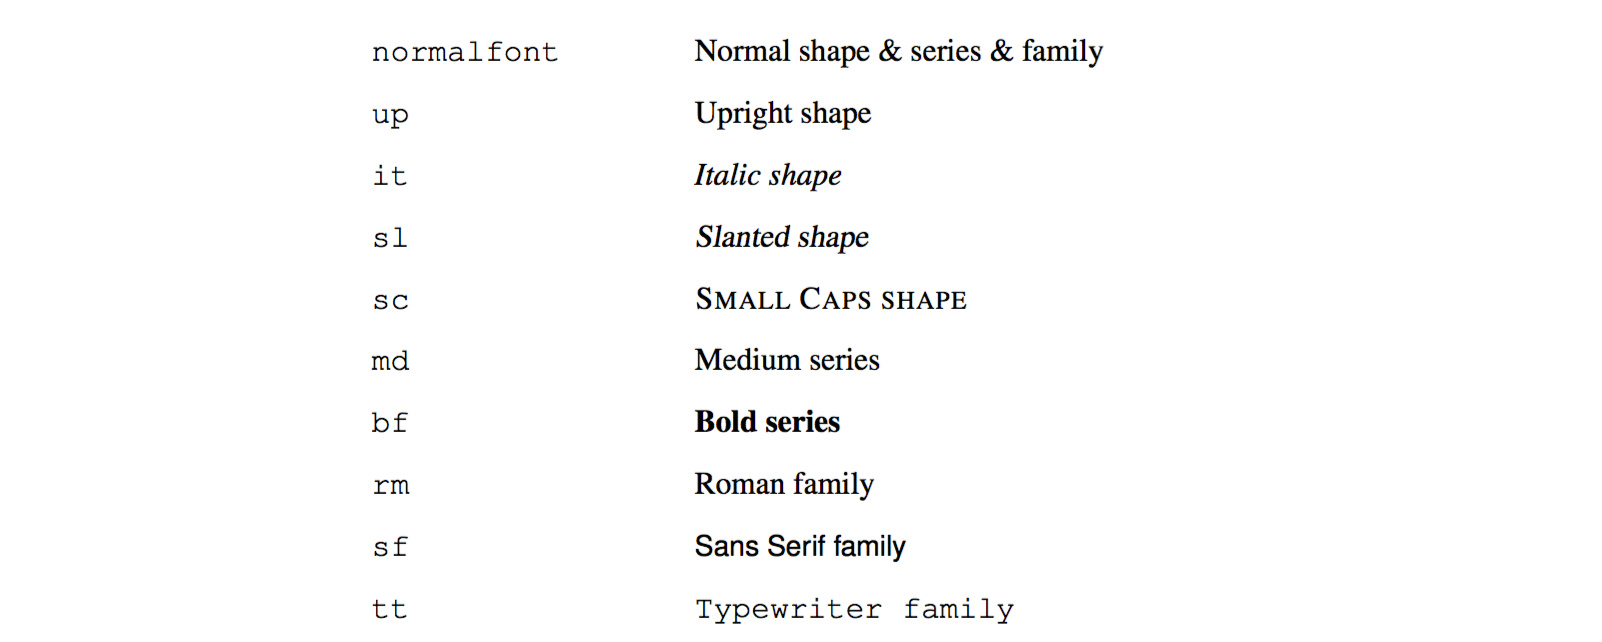
The font options, label, etc. are as follows:

\documentclass[]{article}
\usepackage{ctex}
\usepackage{anyfontsize}
\usepackage{fontspec}
\newCJKfontfamily\qingsong{FZQKBYSJW--GB1-0}
\renewcommand{\small}{\fontsize{8pt}{\baselineskip}\selectfont}
\bibliographystyle{unsrt}
\usepackage{caption}
\captionsetup[figure]{font = small}
\begin{document}
\begin{figure}
\centering
\includegraphics[width = 0.5\textwidth]{111.jpeg}
\caption{\qingsong {Hello}}
\end{figure}
\end{document}